📌 A Comprehensive, Step-by-Step Troubleshooting Manual for Windows, macOS & Linux Users
📑 Table of Contents
- 🔍 Understanding the Problem
- ⚡ Quick Fixes That Work 90% of the Time
- 🖥️ Windows-Specific Solutions
- 🍎 macOS-Specific Solutions
- 🐧 Linux-Specific Solutions
- 🔧 Router & Modem Troubleshooting
- 🌐 DNS & IP Configuration Fixes
- 🛡️ Firewall & Antivirus Conflicts
- 📊 Troubleshooting Comparison Table
- ❓ Frequently Asked Questions
- ✅ Final Checklist
🔍 Understanding the Problem
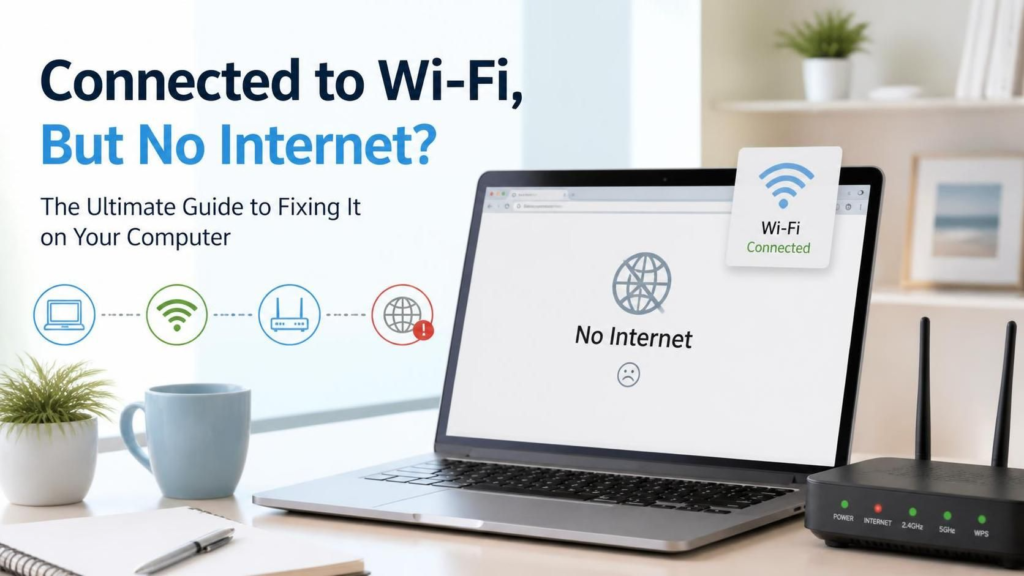
There’s nothing more frustrating than seeing that “Connected to Wi-Fi” status with a cheerful signal icon—only to open your browser and face the dreaded “No Internet Access” or “This site can’t be reached” error. 🤯
This paradoxical situation means your computer has successfully established a local connection to your wireless router, but the router (or your device) is failing to communicate with the wider internet. Understanding this distinction is crucial:
| Connection Type | What It Means | Icon Status |
|---|---|---|
| Wi-Fi Connected | Device ↔ Router ✓ | 📶 Full bars |
| No Internet Access | Router ↔ Internet ✗ | ⚠️ Yellow triangle |
| Limited Connectivity | Partial/DNS failure | 🔶 Exclamation mark |
Why Does This Happen?
The root causes generally fall into three categories:
- 🖥️ Device-Side Issues — Corrupted network settings, outdated drivers, or software conflicts
- 📡 Router/Modem Problems — ISP outages, overheating, or firmware bugs
- 🌐 Configuration Errors — DNS misconfiguration, IP conflicts, or proxy settings
According to Microsoft Support, network connectivity issues are among the top 5 most reported technical problems across all Windows versions. Meanwhile, Apple’s Discussion Forums show similar patterns for macOS users.
⚡ Quick Fixes That Work 90% of the Time
Before diving into complex solutions, try these proven quick fixes. Many users resolve their issues within minutes:
🔄 1. The Classic “Turn It Off and On Again”
| Step | Action | Time |
|---|---|---|
| 1 | Unplug your router & modem | 0 sec |
| 2 | Wait 30 seconds minimum | 30 sec |
| 3 | Plug modem back in, wait for lights | 1-2 min |
| 4 | Plug router back in | 1-2 min |
| 5 | Test connection | 30 sec |
💡 Pro Tip: This process, known as a power cycle, clears the router’s cache and forces a fresh IP lease from your ISP.
✈️ 2. Toggle Airplane Mode
Click the Airplane Mode icon ✈️ in your system tray, wait 10 seconds, then turn it off. This forces your wireless adapter to reset its connection state.
📶 3. Forget and Reconnect to the Network
Settings → Network & Internet → Wi-Fi → Manage Known Networks → Forget [Your Network] → Reconnect🔌 4. Test with an Ethernet Cable
Connect directly to your router via Ethernet. If this works, the issue is specifically with your wireless adapter or Wi-Fi settings.
🖥️ Windows-Specific Solutions
Windows users encounter this issue most frequently due to the OS’s vast hardware ecosystem. Here are the most effective solutions:
🛠️ Method 1: Run the Network Troubleshooter
Windows includes a built-in diagnostic tool:
- Press Win + I → Network & Internet
- Click Network Troubleshooter 🔧
- Follow the on-screen wizard
🛠️ Method 2: Reset Network Stack via Command Prompt
Open Command Prompt as Administrator and run these commands sequentially:
netsh winsock reset
netsh int ip reset
ipconfig /release
ipconfig /renew
ipconfig /flushdns
After executing, restart your computer. This sequence:
- 🔄 Resets the Winsock catalog
- 🔄 Rebuilds TCP/IP stack settings
- 🔄 Releases and renews your IP address
- 🔄 Clears the DNS resolver cache
🛠️ Method 3: Update Network Adapter Drivers
Outdated or corrupt drivers are a leading cause:
| Path | Action |
|---|---|
Win + X → Device Manager | Open Device Manager |
| Expand Network Adapters | Locate your Wi-Fi adapter |
| Right-click → Update Driver | Select “Search automatically” |
| Or: Uninstall Device → Restart | Windows will reinstall automatically |
⚠️ Warning: Always download drivers from the manufacturer’s official website (e.g., Intel, Realtek) rather than third-party sources.
🛠️ Method 4: Disable IPv6
Some networks have IPv6 configuration issues:
- Go to Control Panel → Network Connections
- Right-click your Wi-Fi adapter → Properties
- Uncheck Internet Protocol Version 6 (TCP/IPv6)
- Click OK and restart
🛠️ Method 5: Disable Proxy Settings
Incorrect proxy configurations block internet access:
Settings → Network & Internet → Proxy → Turn OFF "Use a proxy server"🍎 macOS-Specific Solutions
Mac users experience this issue less frequently, but when they do, the solutions are equally straightforward:
🛠️ Method 1: Renew DHCP Lease
- Click → System Preferences → Network
- Select Wi-Fi in the left panel
- Click Advanced… → TCP/IP tab
- Click Renew DHCP Lease 🔄
- Click OK → Apply
🛠️ Method 2: Create a New Network Location
macOS stores network settings in “Locations.” Creating a fresh one eliminates corrupted preferences:
| Step | Action |
|---|---|
| 1 | → System Preferences → Network |
| 2 | Click Location dropdown → Edit Locations |
| 3 | Click + to add a new location |
| 4 | Name it (e.g., “New Wi-Fi”) → Done |
| 5 | Click Apply |
🛠️ Method 3: Reset SMC & NVRAM
For persistent issues, reset your Mac’s system controllers:
For Intel Macs:
- SMC Reset: Shut down → Hold
Shift + Control + Option + Powerfor 10 seconds → Release → Power on - NVRAM Reset: Restart → Hold
Option + Command + P + Rfor 20 seconds
🍎 Apple Silicon Macs (M1/M2/M3): Simply shut down, wait 10 seconds, and power back on. The controllers reset automatically.
🛠️ Method 4: Delete Wi-Fi Preferences Files
Open Terminal and run:
sudo rm /Library/Preferences/SystemConfiguration/com.apple.wifi.message-tracer.plist
sudo rm /Library/Preferences/SystemConfiguration/NetworkInterfaces.plist
sudo rm /Library/Preferences/SystemConfiguration/preferences.plist
Then restart your Mac.
🐧 Linux-Specific Solutions
Linux distributions vary, but these commands work across Ubuntu, Fedora, Debian, and Arch:
🛠️ Method 1: Restart Network Manager
sudo systemctl restart NetworkManagerOr for older systems using networking:
sudo systemctl restart networking🛠️ Method 2: Release and Renew IP (DHCP)
sudo dhclient -r
sudo dhclient
🛠️ Method 3: Check DNS Resolution
Test if DNS is the culprit:
nslookup google.comIf this fails, temporarily switch to Google DNS:
sudo nano /etc/resolv.conf
# Add these lines:
nameserver 8.8.8.8
nameserver 8.8.4.4
🛠️ Method 4: Disable Power Management for Wi-Fi
Linux sometimes power-saves the wireless adapter too aggressively:
sudo iwconfig wlan0 power off🔧 Router & Modem Troubleshooting
If multiple devices show “No Internet,” your router or ISP is likely the culprit.
📊 Router Diagnostic Checklist
| Check | Status | Action |
|---|---|---|
| Power LED solid? | 🔴 Blinking/Off | Check power cable |
| Internet/WAN LED? | 🔴 Off/Red | ISP issue or cable loose |
| All devices affected? | ✅ Yes | Router/ISP problem |
| One device affected? | ✅ Yes | Device-specific issue |
| Overheating? | 🔥 Hot | Improve ventilation |
🛠️ Factory Reset Your Router
Locate the Reset button (usually a small pinhole):
- Power on the router
- Press and hold the reset button for 10-15 seconds
- Wait for lights to flash and reboot
- Reconfigure your network settings
⚠️ Caution: This erases all custom settings including Wi-Fi name and password.
🛠️ Check for ISP Outages
Visit your ISP’s status page or use third-party services like Downdetector to verify if there’s a regional outage.
🌐 DNS & IP Configuration Fixes
DNS (Domain Name System) translates website names to IP addresses. When DNS fails, you can be “connected” but unable to browse.
🛠️ Switch to Public DNS Servers
| DNS Provider | Primary | Secondary | Features |
|---|---|---|---|
| Google DNS | 8.8.8.8 | 8.8.4.4 | Fast, reliable 🌍 |
| Cloudflare | 1.1.1.1 | 1.0.0.1 | Privacy-focused 🔒 |
| OpenDNS | 208.67.222.222 | 208.67.220.220 | Parental controls 👨👩👧 |
| Quad9 | 9.9.9.9 | 149.112.112.112 | Security-focused 🛡️ |
How to Change DNS on Windows:
- Control Panel → Network Connections
- Right-click Wi-Fi → Properties
- Select Internet Protocol Version 4 (TCP/IPv4)
- Click Properties → Use the following DNS server addresses
- Enter your preferred DNS servers
- Click OK ✅
🛠️ Fix IP Address Conflicts
An IP conflict occurs when two devices share the same address:
ipconfig /allLook for “Autoconfiguration IPv4 Address” starting with 169.254.x.x — this indicates a DHCP failure.
Solution: Set a static IP within your router’s range (e.g., 192.168.1.100).
🛡️ Firewall & Antivirus Conflicts
Security software can be overly aggressive, blocking legitimate internet traffic.
Common Culprits:
| Software | Known Issue | Solution |
|---|---|---|
| Windows Defender Firewall | Blocks outbound connections | Reset firewall rules |
| Norton / McAfee | Network proxy conflicts | Disable web protection temporarily |
| VPN Clients | Stuck virtual adapters | Uninstall or disable VPN |
| Third-party Firewalls | Strict rule sets | Whitelist browser applications |
🛠️ Reset Windows Firewall
netsh advfirewall reset🛠️ Disable VPN Temporarily
Many VPN clients leave behind “ghost” network adapters when they crash:
Settings → Network & Internet → VPN → Disconnect/Remove📊 Troubleshooting Comparison Table
Here’s a quick-reference guide to identify your specific issue:
| Symptom | Likely Cause | Quick Fix | Difficulty |
|---|---|---|---|
| ⚠️ Yellow triangle on Wi-Fi icon | Limited connectivity / APIPA | ipconfig /release & /renew | ⭐ Easy |
| 🌐 Browser shows “DNS_PROBE_FINISHED” | DNS failure | Change to Google DNS | ⭐ Easy |
| 🔴 Red X on network icon | Adapter disabled / driver issue | Re-enable adapter in Device Manager | ⭐⭐ Medium |
| 🐌 Extremely slow but “connected” | Bandwidth saturation / QoS | Check connected devices | ⭐⭐ Medium |
| 📡 All devices affected | Router/ISP failure | Power cycle modem & router | ⭐ Easy |
| 🔒 “Connected, secured” but no sites load | Proxy / Firewall block | Disable proxy, check firewall | ⭐⭐ Medium |
| 🔄 Constant disconnections | Power management / interference | Update drivers, change Wi-Fi channel | ⭐⭐⭐ Hard |
❓ Frequently Asked Questions
❓ Q1: Why does my Wi-Fi say “Connected” but shows “No Internet”?
A: Your device has successfully connected to the router’s local network, but the router isn’t passing traffic to the internet. This could be due to ISP issues, router misconfiguration, or device-specific DNS/IP problems.
❓ Q2: Can a virus cause “No Internet” issues?
A: Yes! Malware can modify proxy settings, DNS configurations, or install malicious network adapters. Run a full scan with Malwarebytes or Windows Defender.
❓ Q3: Why does the issue fix itself after a few minutes?
A: This usually indicates a temporary DHCP lease expiration, ISP hiccup, or router overheating. If it’s frequent, update your router’s firmware.
❓ Q4: Will resetting my router delete my Wi-Fi password?
A: A factory reset will erase everything. However, a simple power cycle (unplugging for 30 seconds) preserves all settings.
❓ Q5: Is this issue related to my network adapter hardware?
A: If the problem persists across multiple networks (home, coffee shop, office), your wireless adapter may be failing. Consider a USB Wi-Fi dongle as a test.
✅ Final Checklist
Before calling your ISP or a technician, verify you’ve completed these steps:
- ⏻️ Power cycled modem and router
- 🔄 Restarted your computer
- 📶 Forgot and reconnected to Wi-Fi network
- 🔌 Tested with Ethernet cable
- 🛠️ Ran built-in network troubleshooter
- 💻 Reset network stack (
netshcommands) - 🔄 Updated network adapter drivers
- 🌐 Changed DNS to 8.8.8.8 or 1.1.1.1
- 🔥 Temporarily disabled firewall/antivirus
- 🚫 Disabled VPN and proxy settings
- 🍎 Reset SMC/NVRAM (Mac users)
- 🐧 Restarted NetworkManager (Linux users)
🎯 Conclusion
The “Connected to Wi-Fi, But No Internet” error is one of the most common yet solvable technical issues. By systematically working through device settings, router configurations, and DNS fixes, you can resolve the problem in the vast majority of cases without professional help.
🏆 Key Takeaway: Always start with the simplest solutions (power cycling, reconnecting) before moving to advanced command-line fixes. Document any changes you make so you can revert them if needed.
If you’ve tried everything in this guide and still face issues, the problem likely lies with your Internet Service Provider or failing hardware. Don’t hesitate to contact your ISP’s technical support with your troubleshooting history.
📅 Last Updated: September 2026 | 🏷️ Tags: WiFi Troubleshooting, Network Fix, Windows, macOS, Linux, Internet Connectivity
🔗 External Resources: