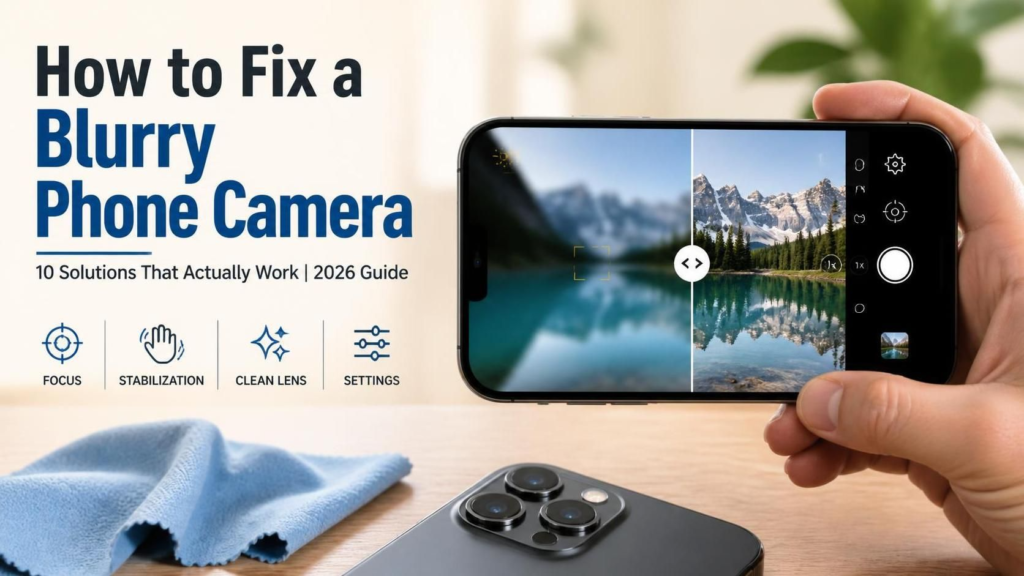
📌 A Practical, Step-by-Step Troubleshooting Guide to Restore Sharp, Crystal-Clear Photos on Any Smartphone
📑 Table of Contents
- 🔍 Why Is My Phone Camera Blurry? Understanding the Root Causes
- ⚡ Quick Fixes to Try First (Under 2 Minutes)
- 🧽 Fix 1: Clean Your Camera Lens Properly
- 👆 Fix 2: Check Your Focus and Tap to Focus
- 🤚 Fix 3: Keep Your Hands Steady & Use Stabilization
- ⚙️ Fix 4: Remove Your Phone Case or Screen Protector
- 📸 Fix 5: Adjust Camera Settings for Clarity
- 🔄 Fix 6: Restart the Camera App & Clear Cache
- 🔋 Fix 7: Check for Software Updates
- 🔧 Fix 8: Reset Camera Settings to Default
- 🌫️ Fix 9: Deal with Condensation & Temperature Issues
- 🔩 Fix 10: When It’s a Hardware Problem
- 📊 Blurry Photo Diagnosis Table
- 📱 iPhone vs. Android: Platform-Specific Tips
- 🛡️ Prevention: How to Keep Your Camera Sharp
- ❓ Frequently Asked Questions
- ✅ Final Checklist Before You Give Up
🔍 Why Is My Phone Camera Blurry? Understanding the Root Causes
You pull out your phone to capture a perfect sunset, a candid smile, or an important document — and the result looks like an impressionist painting. 🎨 Blurry photos are one of the most frustrating smartphone issues because photography is central to how we communicate, work, and preserve memories.
But before you panic and assume your camera is broken, understand this: most blurry photos are caused by software or environmental factors, not hardware failure. According to DXOMARK, the independent camera benchmarking authority, over 60% of “camera quality complaints” submitted by users are resolved without any physical repair.
Blur in smartphone photography generally falls into three categories:
| Blur Type | What It Looks Like | Typical Cause |
|---|---|---|
| Focus Blur | Entire image is soft, no sharp point | Autofocus failure, dirty lens, subject too close |
| Motion Blur | Streaking or ghosting in one direction | Shaky hands, moving subject, slow shutter speed |
| Optical Defect | Persistent blur in one area, haze, or spots | Scratched lens, condensation inside, hardware damage |
Modern smartphones use complex computational photography. The camera module, image signal processor (ISP), software algorithms, and your own technique all have to work in harmony. When one link breaks, the whole chain suffers.
⚡ Quick Fixes to Try First (Under 2 Minutes)
Before diving into detailed troubleshooting, run through these rapid checks:
🔄 1. Wipe the Lens
Use a clean microfiber cloth to gently wipe the camera lens. Smudges from fingers, makeup, or pocket lint are the #1 cause of blurry photos.
📱 2. Tap to Focus
Open the camera app, point at your subject, and tap the screen where you want focus. Wait for the focus box to turn green or for the lens to stop hunting.
⏻️ 3. Restart Your Phone
A simple reboot clears temporary software glitches affecting the camera ISP.
✈️ 4. Switch Between Cameras
Toggle from the main camera to the selfie camera and back. This forces the camera daemon to reinitialize.
🔦 5. Check Lighting
Cameras struggle to focus in very dim environments. Turn on a light or move to a brighter area.
🧽 Fix 1: Clean Your Camera Lens Properly
It sounds obvious, but you’d be shocked how often this is the culprit. Your phone lives in your pocket, your hand, or your bag. It collects oils, dust, and fingerprints constantly.
The Right Way to Clean Your Lens
| ❌ Don’t Do This | ✅ Do This Instead |
|---|---|
| Use your shirt or tissue | Use a microfiber cloth (the kind that comes with glasses) |
| Spray liquid directly on the lens | Lightly dampen the cloth first, then wipe |
| Use household cleaners (Windex, alcohol) | Use lens cleaning solution or distilled water |
| Press hard and scrub in circles | Wipe gently in a spiral from center to edge |
| Forget the secondary lenses | Clean all camera lenses on the back module |
💡 Pro Tip: If you see a persistent haze that won’t wipe away, shine a flashlight at an angle across the lens. If you see scratches or cracks, you’ve identified a hardware issue. If the glass looks clear but photos are still hazy, the blur is likely internal condensation or software-related.
👆 Fix 2: Check Your Focus and Tap to Focus
Smartphone cameras use autofocus (AF) systems — either phase-detection (PDAF), laser autofocus, or time-of-flight (ToF) sensors. These systems aren’t perfect. They can hunt, lock onto the wrong subject, or fail entirely in certain conditions.
How to Master Focus on Your Phone
Step-by-Step:
| Step | Action | Result |
|---|---|---|
| 1 | Open camera app | Default autofocus activates |
| 2 | Tap on your subject on the screen | Focus locks onto that point |
| 3 | Look for the focus indicator | Yellow/white box or “AE/AF Lock” |
| 4 | Hold steady for 1 second | Camera completes exposure calculation |
| 5 | Press shutter | Sharp photo |
Common Focus Mistakes
| Mistake | Why It Causes Blur | Solution |
|---|---|---|
| Tapping shutter immediately | Camera hasn’t finished focusing yet | Wait for the focus box to confirm |
| Subject too close | Macro limit exceeded | Move back 10-15 cm or use Macro mode |
| Low contrast scene | AF can’t find edges to lock onto | Tap on a high-contrast area |
| Shooting through glass | AF locks on reflection or smudges | Get closer to glass, turn off flash |
| Moving subject | Subject exits focus plane | Use Burst mode or Sports mode |
📸 iPhone users: Press and hold on the subject until “AE/AF LOCK” appears. This locks focus and exposure, preventing the camera from “hunting” as you recompose.
📸 Android users: Most Samsung, Pixel, and Xiaomi phones support focus lock by long-pressing the subject. Look for the lock icon.
🤚 Fix 3: Keep Your Hands Steady & Use Stabilization
Camera shake is the silent killer of sharp photos. It becomes especially problematic in low light when the camera uses a slower shutter speed to gather more light.
Understanding Shutter Speed and Shake
| Light Level | Typical Shutter Speed | Safe Handheld Limit |
|---|---|---|
| Bright daylight | 1/1000 sec | Very safe — hard to shake |
| Overcast / shade | 1/250 sec | Easy to keep steady |
| Indoor lighting | 1/60 sec | Moderate shake risk |
| Dim restaurant | 1/15 sec | High shake risk — tripod needed |
| Night scene | 1/4 sec | Impossible handheld |
Stabilization Techniques
| Technique | How To Do It | Effectiveness |
|---|---|---|
| Two-hand grip | Hold phone with both hands, elbows tucked | ⭐⭐⭐ |
| Lean against wall | Brace your body against a solid surface | ⭐⭐⭐⭐ |
| Use volume button | Press physical button instead of tapping screen | ⭐⭐⭐ |
| Enable grid lines | Settings → Grid → Align horizon to reduce sway | ⭐⭐ |
| Tripod / phone stand | Place phone on stable surface | ⭐⭐⭐⭐⭐ |
| Timer mode (3s) | Set timer, press shutter, let phone settle | ⭐⭐⭐⭐ |
Optical vs. Digital Stabilization
| Type | How It Works | Found In |
|---|---|---|
| OIS (Optical) | Physical lens element moves to counter shake | Flagship phones (iPhone Pro, Galaxy S Ultra, Pixel Pro) |
| EIS (Electronic) | Software crops and shifts frames to stabilize | Most mid-range and budget phones |
| Sensor-shift | The sensor itself moves (Apple’s advanced OIS) | iPhone 13 Pro and newer |
⚠️ Important: Stabilization helps with handshake, not subject motion. If your subject is running, dancing, or a pet moving, you need fast shutter speed — which means bright light or Night/Sports mode.
⚙️ Fix 4: Remove Your Phone Case or Screen Protector
This is one of the most overlooked causes of blurry photos — especially on phones with large, protruding camera modules.
How Cases Cause Blur
| Issue | What Happens | How to Check |
|---|---|---|
| Case obstructing lens | Plastic or leather partially covers the camera | Look at your camera module — is the case flush or overlapping? |
| Thick case causing reflections | Light bounces inside the case rim, creating lens flare | Remove case, take same photo, compare |
| Magnetic case interference | Magnets in wallet cases can disrupt OIS | Remove case, test camera stabilization |
| Screen protector over front camera | Selfies look smeared or foggy | Peel protector back slightly, test selfie |
💡 Test: Take a photo with the case on. Remove the case. Take the exact same photo. If the second image is noticeably sharper, your case is the culprit. Consider switching to a case with a larger camera cutout.
📸 Fix 5: Adjust Camera Settings for Clarity
Default camera settings aren’t always optimized for sharpness. Sometimes the “smart” features work against you.
Settings to Check and Adjust
| Setting | Recommended Value | Why |
|---|---|---|
| Resolution | Highest available (e.g., 50MP, 108MP, ProRAW) | Higher resolution = more detail |
| HDR | Auto or ON for high-contrast scenes | Prevents overexposure but can cause slight blur if subject moves |
| Night Mode | OFF in daylight | Forces long shutter; causes motion blur in bright scenes |
| Portrait Mode | Use only for actual portraits | Edge detection can soften non-face subjects |
| Beauty Mode / Filters | OFF | Aggressive skin smoothing destroys fine detail |
| HEIF / HEIC format | Your preference | Smaller files, same quality; switch to JPEG for maximum compatibility |
| Grid Lines | ON | Helps you compose straight, stable shots |
Pro Mode for Advanced Users
If your phone has a Pro/Manual mode, you can force sharpness:
| Control | Setting for Sharp Photos |
|---|---|
| ISO | Lowest possible (ISO 50-100) in daylight |
| Shutter Speed | 1/125 sec or faster for handheld |
| Focus | Manual focus set to your subject distance |
| White Balance | Auto, or match to lighting conditions |
🔄 Fix 6: Restart the Camera App & Clear Cache
Software bugs in the camera app can cause persistent blur, focus hunting, or processing errors.
How to Restart the Camera App
iPhone:
- Swipe up from bottom (or double-click Home button)
- Find Camera app card
- Swipe up to close it
- Reopen Camera from home screen
Android:
- Tap the square/recents button
- Swipe the Camera app away
- Reopen Camera
Clear Camera App Cache (Android Only)
Corrupted cache files can cause the camera to process images incorrectly:
Settings → Apps → Camera → Storage → Clear Cache⚠️ Warning: Do NOT tap “Clear Storage” unless you want to reset all camera settings to factory defaults.
🔋 Fix 7: Check for Software Updates
Camera performance is heavily dependent on software. Phone manufacturers frequently release updates that improve autofocus algorithms, image processing, and noise reduction.
How to Update
| Platform | Path |
|---|---|
| iPhone | Settings → General → Software Update |
| Stock Android / Pixel | Settings → System → System Update |
| Samsung One UI | Settings → Software Update → Download and Install |
| Xiaomi MIUI / HyperOS | Settings → About Phone → System Update |
| Oppo / Realme | Settings → Software Update |
🆕 Why updates matter: Apple’s “Photonic Engine” and Google’s “HDR+” are computational features that exist entirely in software. A buggy algorithm in iOS 17.0 caused widespread focus issues on iPhone 15 Pro units — fixed entirely via a software patch in iOS 17.1. Always keep your OS current.
🔧 Fix 8: Reset Camera Settings to Default
If you’ve tweaked settings over time and can’t remember what’s changed, a reset often restores clarity.
iPhone:
Settings → Camera → Preserve Settings → Turn all OFF
Settings → General → Transfer or Reset iPhone → Reset → Reset All Settings
This resets all settings but keeps your photos and apps.
Samsung:
Camera App → Settings (gear icon) → Reset Settings → ConfirmGoogle Pixel:
Camera App → Settings → More Settings → Reset to DefaultXiaomi:
Camera App → ≡ Menu → Settings → Restore Defaults🌫️ Fix 9: Deal with Condensation & Temperature Issues
Have you ever moved from an air-conditioned room to humid outdoor air and found your camera fogged up? That’s condensation — and it’s a major cause of blurry photos.
How Condensation Forms
| Scenario | What Happens |
|---|---|
| Cold AC room → Hot outdoors | Moist air condenses on cold lens glass |
| Rainy weather → Dry pocket | Humidity gets trapped inside camera module |
| Steamy kitchen / bathroom | Water vapor coats the lens |
How to Fix It
| Method | Instructions | Time |
|---|---|---|
| Air dry naturally | Leave phone in a dry, room-temperature environment | 30-60 minutes |
| Silica gel packets | Place phone in a sealed bag with silica gel packs | 2-4 hours |
| Rice (emergency only) | Submerge in uncooked rice — absorbs moisture | 24 hours |
| Hair dryer (low heat) | Blow dry from 30cm away on cool/low setting | 5-10 minutes |
| Sunlight (indirect) | Place near a sunny window — NOT direct sun | 1-2 hours |
⚠️ Never: Use high heat, microwave, or oven. Extreme heat damages the OLED screen and battery.
Prevention Tips
- 📱 Use a water-resistant phone case in humid climates
- 🌡️ Let your phone acclimate gradually when moving between extreme temperatures
- 🧴 Keep a small microfiber cloth in your bag for immediate lens wiping
🔩 Fix 10: When It’s a Hardware Problem
If you’ve tried every software fix and your photos are still consistently blurry, you may have a hardware defect.
Signs of Hardware Failure
| Symptom | Likely Hardware Issue | Repair Needed? |
|---|---|---|
| Persistent blur on ONE camera only | Faulty lens element or sensor | Yes — camera module replacement |
| Blur + rattling sound when shaking phone | Loose OIS mechanism | Yes — stabilization repair |
| Photos have purple/green tint + blur | Damaged IR filter or sensor | Yes — module replacement |
| Blur that worsens over weeks | Scratched lens or degrading adhesive | Yes — lens replacement |
| Camera app crashes + blur | Failed ISP or connector | Yes — motherboard or flex repair |
| Blur after phone drop / water exposure | Physical damage to optics | Yes — immediate service |
What to Do
- Run a diagnostic: Many phones have built-in hardware tests
- Samsung: Dial
*#0*#in Phone app → Tap “Mega Cam” to test - iPhone: Use Apple Support app → Run diagnostics remotely
- Samsung: Dial
- Check warranty status:
- iPhone: Apple Check Coverage
- Samsung: Samsung Support
- Google Pixel: Pixel Support
- Visit authorized service: If under warranty, repairs are often free. Out-of-warranty camera module replacements typically cost $80–$250 depending on the model.
📊 Blurry Photo Diagnosis Table
Use this table to identify your specific issue and jump to the right fix:
| What You See | Likely Cause | Go To Fix | Difficulty |
|---|---|---|---|
| 🖐️ Soft focus everywhere, like vaseline on lens | Dirty lens or case obstruction | Fix 1 + Fix 4 | ⭐ Easy |
| 🏃 Streaks or ghost trails | Camera shake or moving subject | Fix 3 | ⭐ Easy |
| 🎯 Subject blurred, background sharp | Wrong focus point | Fix 2 | ⭐ Easy |
| 🧒 Selfies look painted/smoothed | Beauty filter ON | Fix 5 | ⭐ Easy |
| 🌙 Night photos are muddy | Night mode + handshake | Fix 3 + Fix 5 | ⭐⭐ Medium |
| 🌫️ Hazy, low-contrast images | Condensation | Fix 9 | ⭐⭐ Medium |
| 📱 Blur started after OS update | Software bug | Fix 7 | ⭐ Easy |
| 🔍 One camera works, other doesn’t | Hardware failure | Fix 10 | ⭐⭐⭐ Hard |
| 🎨 Weird colors + blur | Sensor damage | Fix 10 | ⭐⭐⭐ Hard |
📱 iPhone vs. Android: Platform-Specific Tips
🍎 iPhone-Specific Advice
| Feature | Tip |
|---|---|
| Macro Mode | iPhone 13 Pro+ automatically switches to Ultra Wide for close-ups. If blurry, move back slightly or force the 1x lens. |
| ProRAW / ProRes | Enable in Settings → Camera → Formats for maximum editing flexibility and sharpness recovery. |
| Photonic Engine | Works automatically in mid-light. If photos look overprocessed, try disabling “Scene Detection.” |
| Lens Correction | Settings → Camera → Lens Correction — fixes Ultra Wide distortion that can appear as edge blur. |
🤖 Android-Specific Advice
| Brand | Specific Tip |
|---|---|
| Samsung Galaxy | Disable “Scene Optimizer” if it’s over-softening images. Use “Expert RAW” app for full control. |
| Google Pixel | Pixel’s processing is aggressive. If portraits look blurry, disable “Face Unblur” or use standard Photo mode instead of Portrait. |
| Xiaomi / Redmi | MIUI’s “AI Camera” often oversharpens then softens. Switch to “Photo” mode with AI OFF for natural sharpness. |
| OnePlus | Hasselblad color tuning can reduce perceived sharpness. Use “Pro Mode” with sharpening set to +1 or +2. |
| Sony Xperia | Xperia’s auto-focus is conservative. Always tap to focus, or use Photography Pro with continuous AF-C. |
🛡️ Prevention: How to Keep Your Camera Sharp
An ounce of prevention is worth a pound of blurry pixels.
| ✅ Do This | ❌ Avoid This |
|---|---|
| Clean your lens weekly with a microfiber cloth | Wiping lens with your shirt, tissues, or fingers |
| Use a case with precise camera cutouts | Cases that overlap or press against the lens module |
| Update your phone OS monthly | Ignoring camera-related security patches |
| Store phone lens-up on clean surfaces | Placing phone directly on sandy, dirty, or wet tables |
| Use a screen protector that avoids the selfie camera | Thick tempered glass that covers the front camera |
| Let your phone acclimate to temperature changes | Moving rapidly from AC to extreme heat/humidity |
| Enable ” grid lines” for stable composition | Shooting one-handed while walking |
❓ Frequently Asked Questions
❓ Q1: Why are my photos blurry only at night?
A: Low light forces your camera to use a slow shutter speed (longer exposure time) to gather enough light. Any movement — your hand, the subject, or even pressing the shutter button — causes motion blur. Use Night Mode (which combines multiple fast frames), brace your phone against a wall, or add artificial light.
❓ Q2: Can a screen protector make my selfies blurry?
A: Yes. Thick tempered glass protectors, especially those with privacy filters or “anti-blue light” coatings, can diffuse light entering the front camera. If your selfies became blurry right after applying a protector, that’s almost certainly the cause.
❓ Q3: Why does my iPhone camera keep refocusing (hunting)?
A: This is called focus hunting. It happens when the scene lacks contrast (e.g., a white wall), the subject is too close, or there’s a software bug. Tap and hold to lock focus (AE/AF Lock), move back slightly, or restart the Camera app.
❓ Q4: Will a factory reset fix my blurry camera?
A: Only if the blur is caused by software corruption or bad settings. If you’ve tried clearing cache, updating, and resetting camera settings without success, a factory reset might help — but back up your data first. If the blur persists after a factory reset, it’s hardware.
❓ Q5: My back camera is blurry but front camera is sharp. What’s wrong?
A: This strongly suggests a hardware issue with the rear camera module — specifically the main (wide) lens. It could be a displaced lens element, damaged OIS, or sensor failure. The front camera uses a completely separate module, which is why it works fine. Visit a service center.
❓ Q6: Does dropping my phone always damage the camera?
A: Not always, but camera modules are delicate. The OIS (Optical Image Stabilization) mechanism contains tiny floating magnets and springs. A hard drop can dislodge these, causing permanent blur, weird rattling sounds, or focus failure. Even if the glass doesn’t crack, internal damage is possible.
❓ Q7: Can third-party camera apps fix blurry photos?
A: Sometimes. Apps like ProCamera, Halide, Adobe Lightroom Mobile, or Open Camera give you manual control over focus, shutter speed, and ISO. If your stock camera’s autofocus is buggy, a manual-focus third-party app can bypass the issue. However, they cannot fix physical lens damage.
✅ Final Checklist Before You Give Up
Before concluding that your camera is broken, verify you’ve completed every step:
- 🧽 Camera lens cleaned with microfiber cloth (both front and back)
- 🧽 All lenses on multi-camera module cleaned
- 👆 Tapped screen to focus before every shot
- ⏳ Waited for focus confirmation before pressing shutter
- 🤚 Held phone with both hands, elbows tucked
- 🧱 Braced against a wall or used a tripod for low light
- 📱 Removed phone case and tested without it
- 🎨 Disabled Beauty Mode, filters, and excessive HDR
- 🔄 Camera app force-closed and reopened
- 🧹 Camera app cache cleared (Android)
- 🆕 Phone OS updated to latest version
- ⚙️ Camera settings reset to factory defaults
- 🌫️ Checked for condensation and allowed phone to dry
- 🌡️ Phone acclimated to ambient temperature
- 🔋 Battery above 20% (some phones disable OIS when low)
- 💾 Sufficient storage space (blur can occur if phone can’t save full-resolution image)
- 📸 Tested in bright daylight with static subject
- 🔍 Compared main lens vs. ultra-wide vs. telephoto to isolate the problem
🎯 Conclusion
A blurry phone camera doesn’t have to mean an expensive repair or a trip to the service center. In the overwhelming majority of cases, the culprit is something simple: a smudged lens, shaky hands, the wrong camera mode, or an overly aggressive beauty filter. By working through the ten solutions in this guide systematically, you can restore your phone’s photographic sharpness without spending a single pound, dollar, or riyal.
Start with the basics — clean the lens, check your case, and master tap-to-focus. Move into settings optimization and stabilization techniques. Only when every software avenue is exhausted should you consider hardware failure.
🏆 Key Takeaway: The most common cause of blurry photos isn’t a broken camera — it’s a dirty lens and camera shake. These two factors alone account for over half of all “my camera is broken” complaints. Make lens cleaning a weekly habit and learn to brace your phone properly, and you’ll capture sharp, share-worthy photos every time.
If you’ve completed every step in this guide and your camera still produces consistently blurry images across all lenses and lighting conditions, it’s time to seek professional help. Visit your manufacturer’s authorized service center with your warranty information. Modern smartphone cameras are marvels of engineering, but like any precision instrument, they can be damaged — and when software can’t save it, a skilled technician can.
📅 Last Updated: September 2026 | 🏷️ Tags: Fix Blurry Camera, Phone Camera Blurry, Smartphone Photography, iPhone Camera Fix, Android Camera Blurry, Mobile Camera Troubleshooting
🔗 External Resources: